YOUR WATERPROOFING PLAN
- 1Space
- 2Your home
- 3Depth & finish
- 4Symptoms
- 5Water entry
- 6Method
- 7Your estimate
Your draft stays in this tab for 24 hours.
Understand the work.
01 / INSIDE THE BASEMENT
Give water a way out.
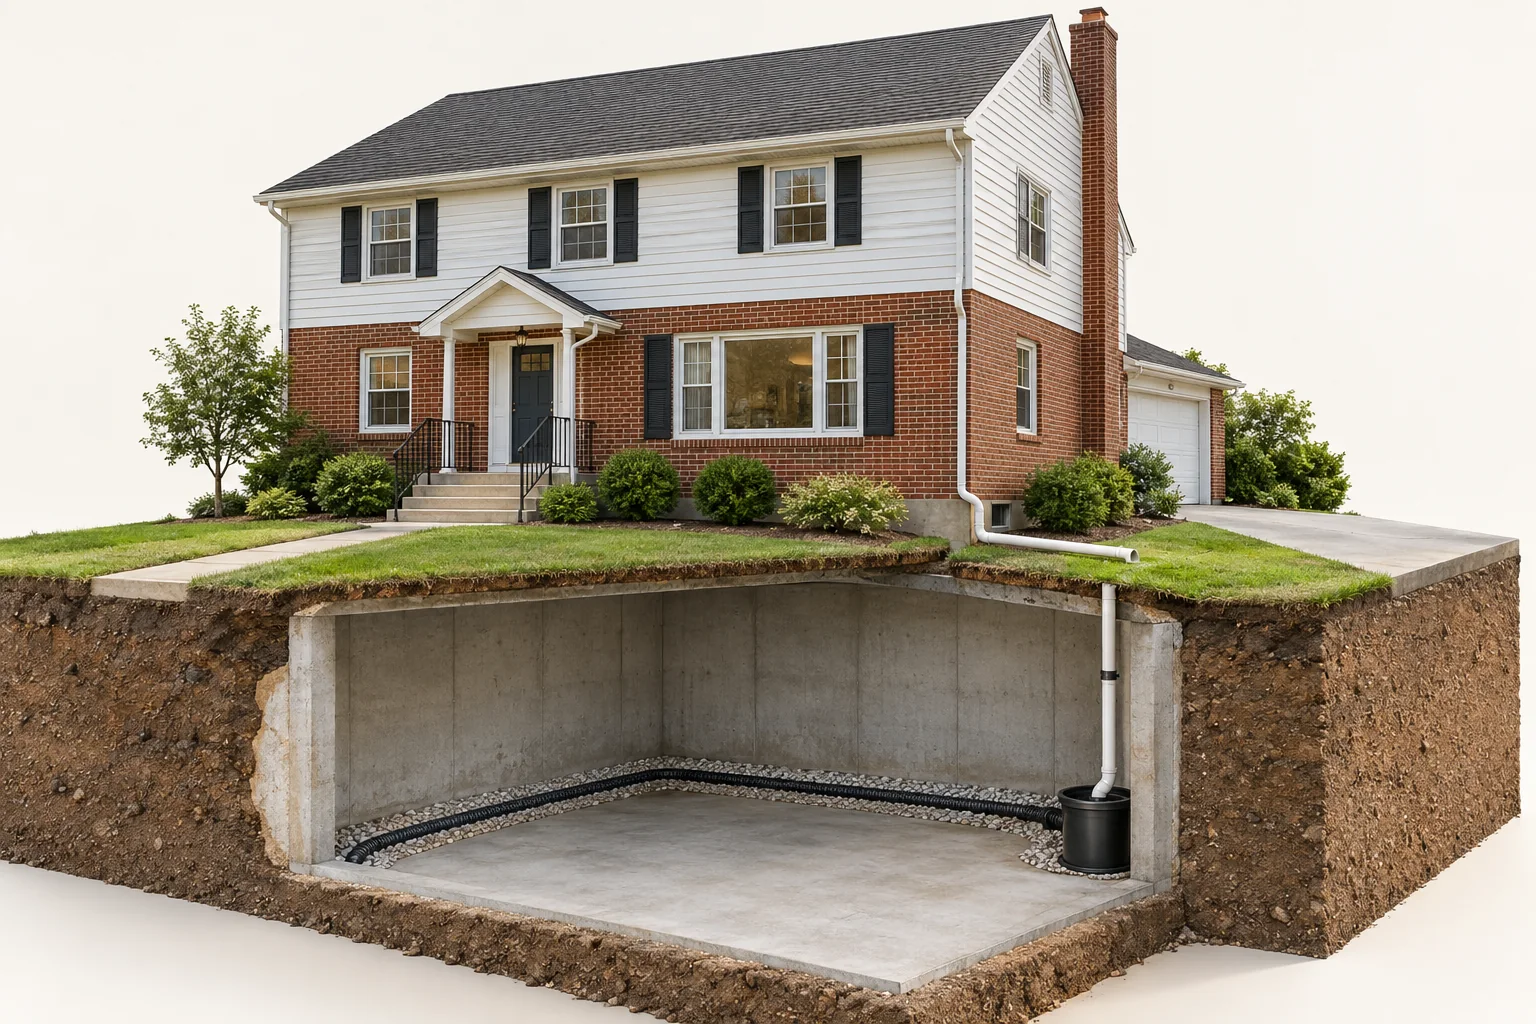
Interior drainage collects water and directs it to a sump system.
01Collect along the perimeter
The concrete edge is opened so a drain can collect water beside the basement wall. The image shows the open channel before the floor is restored.
02Move water to the sump
The channel leads to a basin. A pump moves the collected water through a discharge pipe. Confirm whether the quoted drain system includes the pump.
03Keep roof water away
Gutters and downspouts help manage roof runoff. A contractor should check the discharge route and surface grading as well as the basement.
02 / OUTSIDE THE FOUNDATION
Stop water at the wall.
Exterior work adds excavation, access and restoration to the scope.

01A barrier on the outside
The membrane limits water entry through the wall. The drainage board protects the membrane and gives water a path down to the footing drain.
02Drainage at the footing
A gravel bed and drain collect water at the base of the foundation. The outlet, elevation and discharge route need to be confirmed for the property.
03Room to do the work
Access for equipment, excavated soil and surface restoration can change the scope. Excavation depth and protective systems require a site-specific plan.